Short & Sweet: New Adentures, New Lessons

15 Apr
Image

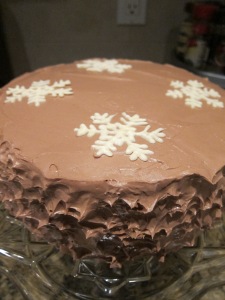
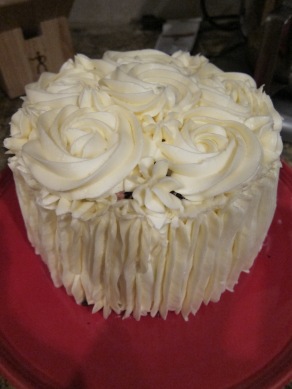
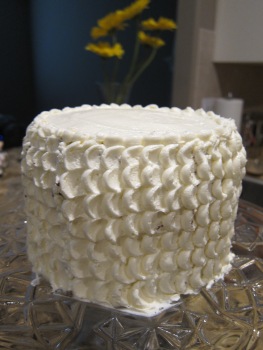
The “Petal” frosting technique with a few accidental crumbs

As a thank you gift for puppy-sitting while I take a week long adventure with my gentleman caller, I made a cake since that’s what I do. It was originally supposed to be a repeat of chocolate cake with chocolate hazelnut frosting, but kitchen disasters happened and the second batch of frosting was a simpler and less risky coconut buttercream. Mistakes were made, mistakes turned out to be improvements, and lessons were learned overall. And that, my friends, is what I love about baking. You can do it a hundred times and have it be different every time even under the most controlled of circumstances. And a lot of times accidents produce better results than what was supposed to be in the first place. Below is a bulleted list of kitchen disasters and their outcomes.

  • I learned that I should always check the seal on my canister that holds sugar before picking it up by the lid and spilling half of it all over the kitchen (which comes up again later). It was an omen from the start.
  • I thought I was being super efficient by mixing the melted chocolate and the hazelnut paste together before putting them in the frosting base but when I turned around again a solidified chocolate chunk had been left in its place. I thought after beating it into the frosting it would break up and smooth out but this was false. The frosting had little bittles of chocolate chunk in it. Also, pushing frosting though a sieve is not a viable solution to filtering out chocolate chunks. Into the garbage round 1 went. While the easy explanation of what went wrong is magic of the blackest kind, I think the more logical reason (after searching ye olde interwebs) is that the moisture of the paste made the melted chocolate harden.
  • I was one egg short for a second batch of frosting and was over at a friends so she offered to lend me some eggs. The eggs made it out to my car and were almost instantly dropped onto the sidewalk. I took this as another omen that maybe I shouldn’t make the cake.
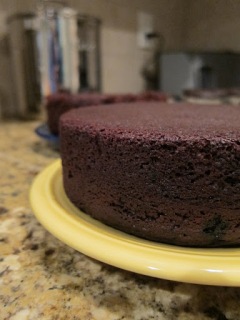
  • Because I spilled half of my sugar in and around the kitchen, when it came time to make the cake portion I didn’t have enough. At this point I kind of threw my hands up in the air and said “how about half of it brown sugar for kicks?” This actually turned out to be a genius idea. The cake was moister than with all regular sugar and if anything tastes better. Win! The cake was more crumby than previous efforts so perhaps this had something to do with it, but tinkering around with the ratios might help with that.
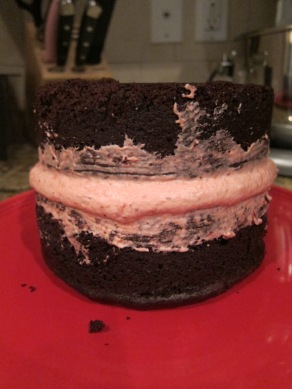
  • After always wondering how people frosted cakes as I did with this one. After searching high and low I finally found an internet tutorial and was blown away at how easy it is. I mean to document the how to process in photo form but kind of forgot, so sorry! Basically, make a line of dots with a large round frosting tip, then using  small spatula indent the dot about halfway in and smear the other half off to the side. Then make another row of dots over the smear and repeat. Note: It took about 2 and a half episodes of The Office to do so just make adequate time.

Now that the cake is made I can start packing my things! Definitely ready for some 80 degree California weather!
Unchartered Territories: Moving Beyond Buttercream

9 Mar
Image

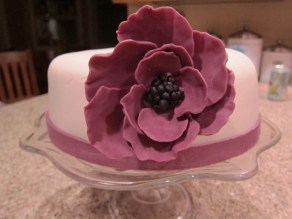
The finished product!

Well, I dipped my toes into a new world today. That world being of marshmallow fondant and modeling chocolate. I have long held out against using either of these two mediums in my cake adventuring because I usually don’t like the way they look and found it kind of silly to spend a lot of time on something that doesn’t taste good.

However, when a new class arrived in an email from Craftsy about a new class called “Clean & Simple Cake Design” I was intrigued. That sounded exactly like how I would describe my cakes! And after watching the brief video trailer and seeing some of the cakes made by the instructor I had to give it a go.

And lucky me it was my mom’s birthday this week! The perfect vehicle for testing something new out. So I went for something rather simple and here are some of the photo captures and lessons learned along the way!

To keep things simple I made a red velvet cake with cream cheese frosting (the easiest of all my cake and frosting combinations). This probably wasn’t the best idea for working with fondant because since cream cheese frosting doesn’t completely set up like butter cream frosting does, there isn’t the firmest surface to apply the fondant on. Thus creating a big ‘ole air bubble underneath. But, lessons learned.

One of my biggest complaints about fondant is that it tastes terrible, but I’d heard whispers on the streets about marshmallow fondant. You’re probably safer not knowing what’s in it, and while it does taste better than regular fondant I still advise against eating it. That being said, it does create a nice smooth surface for applying decorations to a cake.

Image

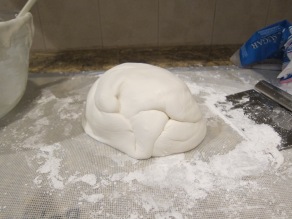
Kneading melted marshmallows and powdered sugar. A sticky job that calls to the inner five year old in me.

Image

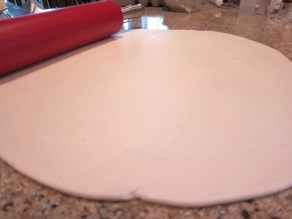
Rolling out the fondant took some upper body strength! I’m not sure if it was because i waited a couple days or if it’s just tough in general, but I really had to yank on that bad boy!

Image

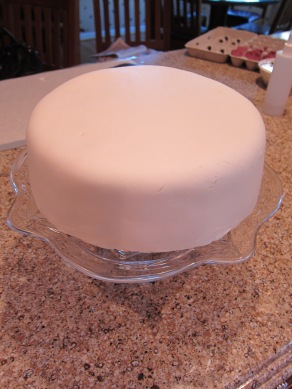
A fondant covered cake. I was impressed that I got it on the first try! It always looks so easy on TV but I was convinced it would be much trickier in real life. Not the case!

Summation of lessons learned/problems:

  • This was the first time I used a cake board and with that I didn’t realize that the board needed to be trimmed a little until the cake was already on it. So a somewhat shoddy exacto knife job ensued (I can’t cut in a straight line to save my life, much less a perfect circle). So, next time I’ll research a little more how to cut the board down to a better size!
  • Now that I’ve worked with modeling chocolate I get the zen of it a little more (such as how much to warm it up with your hands before molding it). Some of the flower petals got a little cracked or ripped because I made them when it was too cold and I didn’t realize it until it had set
  • As much as I resisted this form of cake art I really enjoyed it! It was very therapeutic to plan and cut out shapes and it was fun to see the final results as well!

I still like basic butter cream decorations the best, but I am really excited to have this alternative mode for decorating cakes with which to expand my skills!

Happy Birthday Mama! You are the best mother I could have asked for!

Chocolate Cake with Chocolate Hazelnut Frosting and White Chocolate Garnish

27 Jan
A delightful cake for a winter themed birthday!

A delightful cake for a winter themed birthday!

After taking a short break from cake baking (aka a lot of pies and cookies were made for the holiday season), I have gotten the caking bug once more thanks in part to a series of online cake decorating classes via Craftsy and the need to create an amazingly spectacular birthday cake for one of my best friends. Buckle your seat belts, it was somewhat of a bumpy ride but with delicious results!

Analysis of the Frosting

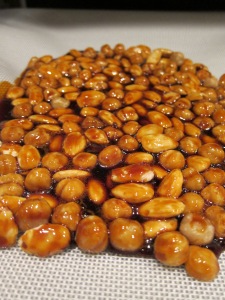
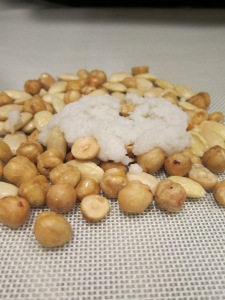
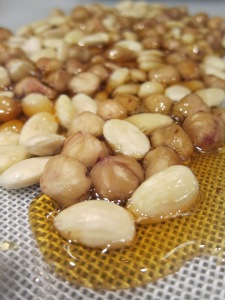
Literally months ago (I believe August to be exact), I was looking through frosting flavors in my go to source, The Cake Bible, and came across one called Classic Chocolate Praline. I decided right then and there to make this fantastic sounding chocolate-hazelnut concoction for my friend’s birthday. So, here comes January and I started preparing myself to make this treat when a bit of a snag happened. The recipe called for praline paste purchased at a confection shop in New Jersey. Being in Oregon, that wasn’t going to happen and based on some of the online prices for praline paste (literally almonds, hazelnuts and sugar) I decided to take it upon myself to find a recipe online and make it at home. While it was quite the learning curve (blanching nuts is a lot more complicated if the recipes leave out the crucial step of an ice bath) what caused the most grief, and eventual triumph and sense of kitchen domination, was caramelizing the sugar. The following photo series shows the errors made and eventual success in my first ever trials at caramelizing sugar.

Round 1: The initial recipe went well up until I let the sugar caramelize a split second too long. It also called for simple syrup added to the food processor portion of the paste creating which resulted in a sticky dough ball. Fail.

Round 2: Armed with a simpler recipe and the thought that if I caramelized the sugar on low heat with frequent whisking, this frothy sugar blob was created. Fail once more.

Round 2: Armed with a simpler recipe and the thought that if I caramelized the sugar on low heat with frequent whisking, this frothy sugar blob was created. Fail once more.

Round 3: Using the same recipe as in the previous round but trying high heat and infrequent stirs, I finally got caramelized sugar properly. It possibly could have gone a tiny bit longer but I didn't want to risk it. Success!

Round 3: Using the same recipe as in the previous round but trying high heat and infrequent stirs, I finally got caramelized sugar properly. It possibly could have gone a tiny bit longer but I didn’t want to risk it. Success!

The steps after this to make the praline paste involve a food processor and blender to turn this sugared nut concoction into more of a peanut butter consistency spread. And honestly, it’s pretty damn delicious on its own. Mix in some 70% high quality chocolate and the Italian meringue buttercream base and you have a delicately hazelnutty frosting.

Overall Impression: A lot of work, but with ohmuhlord results

Analysis of the Cake

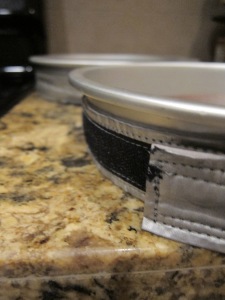
While the cake was not a new recipe, the technique for baking was. I recently purchased some Magic Cake strips. These aluminum based strips wrap around the cake (as seen in the photo below) and through the power of science help the cake to bake evenly across, thus no more domed cake in the center but an even surface all the way across. Which means no leveling of the cake. Which means a happy Hillary. Buy them and use them. They are amazing. They might however speed up baking time (my oven also runs hot so it’s a toss up) so next time I will pay closer attention as the cakes bake. but seriously: amazing.

IMG_0866

Magic Strips for the win!

Original Analysis of the Cake

Decoration Addendum

So I am very very slowly adding to my repertoire of decorating capabilities  and in spite of knowing a ton more techniques from the previously mentioned online classes, I still prefer cakes decorated with a minimalist touch. Since the party this cake was created for was winter themed, I decided to make use of some leftover white chocolate and teach myself to make some snowflake garnishes. After much practicing, I ended up doing pretty well with it in spite of not being a very crafty person. I also thought the sides needed some whimsicality so I did a gentle stucco effect to give it some texture. I was very pleased with how this all turned out and cake by cake I will add to my skills!

In the end, this cake was a whole lot of kitchen experiments that eventually turned out quite well. Now to decide what my next adventure will be…..

Classic Pie: The Pumpkin Kind

24 Nov

My scope of pies that I will gladly and willingly devour is limited. Pumpkin, apple, banana cream. That’s pretty much where I draw the line. So for Thanksgiving, I volunteered to make pumpkin and apple as they are the most seasonal and since we’ve already seen my adventures in apple pie-ing (note: I made the same variety as before for Thanksgiving, in between now and then I used different varieties of apples but it wasn’t different enough to make a post about it) this is my adventure into pumpkin land.

Our pumpkin pie was brought to us by the gods at America’s Test Kitchen because using evaporated milk in your pumpkin pie is for weenies. With the ATK crew, it’s all about the heavy cream. And, more importantly than that it’s an entirely different technique than most pumpkin pies that are made. So let’s break this thing down into three main categories: The crust, the filling, the lessons.

The Crust

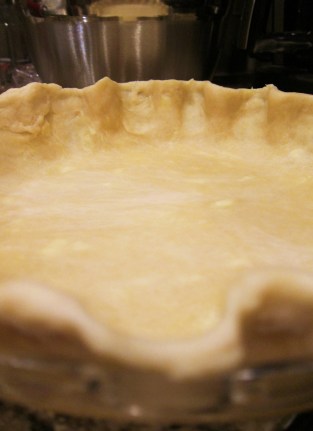
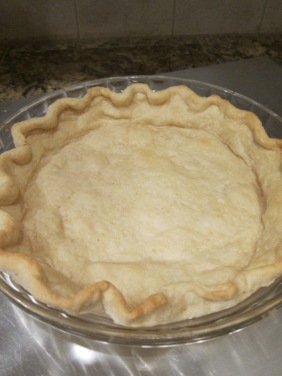
The crust was the same basic recipe that I swear by, only cut down in size because of the whole not needing a top cover thing. Things started out very solid as seen in the photo below.

Image

Damn near fluted perfection

Flaws quickly popped up though, the primary one being the lack of pie weights (I used rice instead). This would have worked well except I took the weight out too soon and in turn got an extremely bubbly pie bottom. I also had some shrinkage issues with the crust as well, which I blame on the seeming toughness of the dough to begin with. I blame an over mixed dough resulting in a too sticky gluten party. The baked crust was a little tough, but still pretty damn flaky. So, lessons learned (and later summarized).

Image

So sinky and bubbly!

The Filling

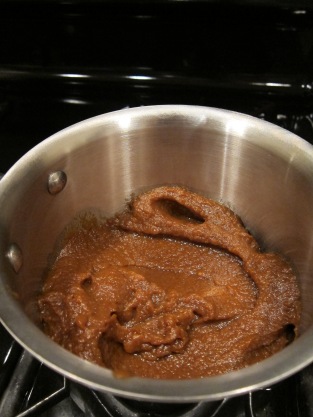
This is where things got very exciting (unless you aren’t as nerdy as me, in which case things will be less exciting). Now, sometimes in spite of how much I love ATK, they get a touch pretentious. One time, they tried to tell me that the preferred place to buy tuna steaks was in the early mornings on a New England dock. That’s extremely helpful, thanks. In the pie’s case, they had the baker (me) puree the pumpkin along with the spices then cook the pie and spices to a bubbling simmer to bake off the “undesireable canned taste” if you are unfortunate enough to not have fresh pumpkin. Personally, I have no idea what they are talking about but in this cooking process you also add the cream and eggs.

Image

Cooking up the filling!

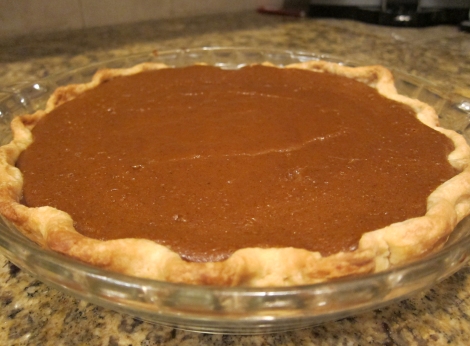
By then basically pre-cooking the filling and pouring the filling directly into the hot baked pie shell crust……insert some kind of scientific drum roll…..you can then blast the pie on high heat for a shorter time period to prevent soakage of filling into the crust. And this brilliant scheme worked perfectly! The only downside to this is I slightly undercooked the pie thinking that my understanding of “the center wiggles like gelatin” was the same as theirs. It was not and even after refrigeration never quite set up. So the edges were cooked well but the inside was like pumpkin pudding. Honestly  I kind of liked it. But, for future bakings I shall cook the pie 5 minutes longer than this go-around.

Image


Overall Impression: Ohmuhlord!!!!!

The Lessons

  • Be super careful how long you food process the dough or toughness will ensue
  • Gelatin is probably firmer than you might think
  • In spite of pretentiousness, ATK knows how to make a flipping good pumpkin pie. Hands down this was infinitely better flavor wise than any other pumpkin pie I’ve ever eaten. Cloves and FRESH (only ever, never pre-grated) nutmeg are the best smell ever.

Happy Thanksgiving everybody! Stay safe this holiday season!

Gala and Granny Smith Apple Pie

5 Oct

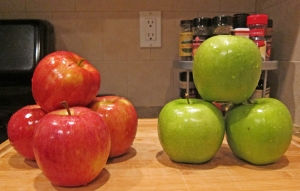
The apples on their way to becomming pie!

It’s that fabulous time of year again! When leaves become crunchy, boots get pulled out of the closet, and crisp air greets the start and end (and sometimes middle) of each day. It’s also the time of year I get the pie bug. I’m not much of a pie eater (I pretty much draw the line at apple and pumpkin) but I do quite love making pies. And I got a last minute bug to make a pie for a potluck extravaganza so I started a new track of questing: apple pies/pies in general. Each person you talk to swears by a different variety of apple and as I have not previously kept detailed track of apples used in pies I decided to start with the experts: America’s Test Kitchen (ATK). Let us go forth and review.

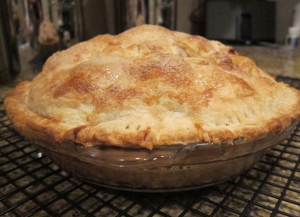
The Final Product!

Not too shabby for the first pie of the season!

Analysis of The Crust

Again, this is an area where people left and right swear they have the best crust. But I will tell you right now people that I indeed have the best crust. This, like our filling, comes from our dear friends at America’s Test Kitchen. The main secret is keeping everything as cold as possible as long as possible. I even threw the pie in the freezer for 10 minutes per their advice prior to baking to ensure maximum coldness before entering the oven. What results is the flakiest, sweetest, most perfect crust ever known to man. AKA the best crust ever. 

And speaking on behalf of the uncooked dough, if there was such a thing as pie crust crack this certainly would be it.

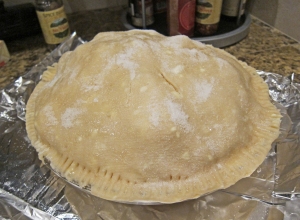
Pre-Baked Goodness

Part of what makes it so delicious is the sugar mixed in the crust AND the sugar sprinkled on top pre-baking.

Overall Impression: Ohmuhlord

Analysis of the Filling

The pros at ATK tested numerous apples and decided that the best combination was McIntosh and Granny Smith. The pros of the granny smith is the classic tartness with the cons being unfortunate mushy texture when baked. By throwing in the McIntosh’s, you get a less flavorful apple that maintains its firmness. However, because this pie was baked on a whim a farmer’s market was not available to get something in the McIntosh family. As I stood in the QFC cursing the gods of apples, a quick google search on my phone directed me to gala apples as a similar substitute. And I must say that the gala did it’s part in retaining a firm texture to offset the mushy granny. And I will also say that it was a damn good pie. But, I still woudl like to push onwards in search of the perfect apple pie. I would like to look at other recipes to see their balance of spices and experiment with more apple varieties. But damn. That was a good pie.

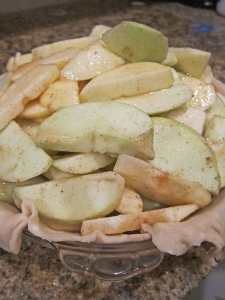
Topless Apple Pie

Delicious apples droozled with delicious seasonings

Overall Impression: On it’s way to ohmuhlord (but still quite delicious)

Fun Side Facts

  • If I was queen of the world I would have a baking kitchen and a cooking kitchen complete with separate utensils, etc. Alas, I am not yet queen of the world and learned the somewhat hard way that potent cooking foods (in this case shallots) should not be prepared on a wood/bamboo cutting board. I definitely took a slice of apple snack while chopping and it tasted straight up like apple-shallot hybrid. Never fear, the shallot taste baked out and all was well and good. I will be attacking my cutting board with lemon and kosher salt very very soon though.
  • At the party this was prepared for another guest brought ice cream from an ice cream food cart in Portland and it was BOMB. Quite frankly, the best vanilla bean ice cream I’ve ever had and I’m generally anti-food cart.
  • One of my favorite but defunct shows, Pushing Daisies, involves sprinkling pies with gruyere cheese. I’ve never tried this specific cheese but have always wanted to because I love the show so much (if you have not seen it do yourself a favor and see it). I bought the smallest chunk of gruyere I could find (at $20 a pound I wasn’t about to get a giant slab) but then forgot it at home. Guess I’ll have to make another pie to try it on 😉

Chocolate Cake with Strawberry Cream Cheese Filling & Cream Cheese Frosting

24 Sep

As my quest thus far has mainly been focused on finding the perfect flavors, it’s been a fairly smooth one. As long as you know something about baking, what has worked well in the past and are willing to put in quite a bit of research looking up countless versions of the same recipe and varied techniques, you can pretty much get it right the first time.

When it comes to decorating said treats, it’s a whole other story. And this particular story involved quite the frustrated meltdown.

As I’ve begun giving people the gift of my baked goods for their birthdays instead of buying material goods,  for this birthday I decided to grant the birthday girl’s request of chocolate cake with Strawberry cream cheese frosting. After doodling around on youtube watching videos on different frosting techniques, I found one that involved decorating a cake with roses all over and said “I can totally do that.” 

Wrong.

The following are lessons I learned and the pictures to go along with them. I also had to be gently reminded that the quest to perfection is full of learning opportunities. I also reminded myself that even if the cake turned out horrendous looking, at least I know the tastes are bomb and in the end, who really cares what it looks like?

Lessons Learned While Perfecting

  • The first problem encountered was through the simple act of removing the cakes from the pans after baking. I have long sworn by parchment rounds in the bottom of the pans, but my trusty Miette cookbook promised me that if I just buttered and cocoa powdered the pans all would be dandy. This worked last time I made cakes….it went awry this time I made cakes. Two giant chunks clung to the pans for dear life which then caused problems later on. Lesson: Always use parchment rounds.
  • So then I figured, well I can simply mend the chunk issue with copious amounts of frosting/filling glue. Wrong. The internal chunkage issues provided for quite a lopsided cake and the copious amounts of frosting/filling  couldn’t handle the weight of the top layer resulting in an ever failing battle against oozing frosting and an uneven cake. At this point, I was able to maintain my cool justifying it with “once it sets in the fridge it will be fine.” Wrong. Lesson: Level out a cake before filling OR make smaller layers with less frosting to get smushed out the sides.
Image

The ever oozing strawberry cream cheese frosting

  • Because of the smushage and the general instability, I thought that instead of frosting with roses all over I would do stripes of frosting up the side and roses on the top only. First, the stripes went on and looked pretty cool. Then the roses went on. While the roses themselves looked good, and the stripes themselves looked good the two of them together screamed “I JUST LEARNED ALL THESE TECHNIQUES AND DID EVERYTHING ALL AT ONCE.” It was pretty overwhelming looking. And cake wreck worthy. So then I scraped off the roses and thought “I’ll just continue the stripes over the top of the cake so they converge in the center.” Wrong again, I have no way to describe what resulted other than my geometric measurements were way off. At this point I had multiple meltdowns, profanitys screamed, gods cursed, the whole shebang. Lesson: Sometimes when you are new at something, you just have to see how things look in real life versus your imaginations.
Image

The mess of too many textures in one single color. So, so busy looking. Too busy.

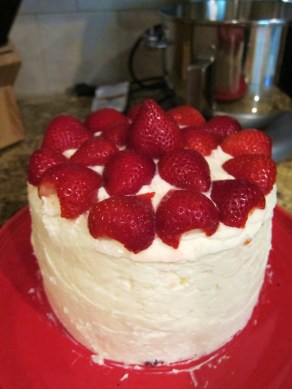
  • My final solution that was realized after fixing (and worsening) the decoration situation was to simply smooth it all over and add sliced strawberries on top. It was a simple, minimalistic approach but it got the job done and the cake looked much more presentable than it had. In the end, it still tasted delicious which is what really matters. The only blasphemous part of the cake is that the filling was made from leftover Oregon Strawberry syrup from earlier in the summer, but topped with the only “in season” strawberries from our state to the south (which don’t count as actual strawberries in my book). Lesson: You always establish the basics first (ie the best tasting recipe) before diving into flourish-y showy things (ie decorating) so that in the end it tastes flipping amazing even if it looks plain.
    Image

    The final product!

A 35th Anniversary Celebration

26 Aug

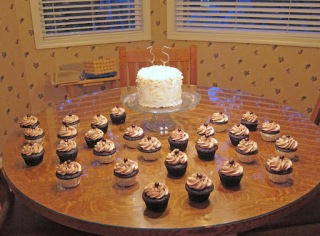
When my parents decided to do a 35th Anniversary party, naturally I stepped up to be in charge of the dessert end of the event. Initially I was planning on doing my two favorite cupcakes: chocolate with mocha frosting and chocolate with coconut frosting. But as the party date drew closer, I decided that I wanted to make a small cake for them to cut combined with cupcakes for the guests to eat. I also haven’t made a “cake cake” in a long time and I do miss the process of making and frosting a cake. The solution was a 6″ chocolate with coconut buttercream cake and the cupcakes in chocolate with mocha.

It was quite the experience making a double batch of both frosting and cake, and I learned that my Kitchen Aide is much better suited for single batches. This makes it easier to someday justify that candy apple red 7 quart Kitchen Aide someday!

Analysis of the Cake
Round two of Miette’s double chocolate cake recipe went even more amazingly than the first round (which was a pretty awesome round on it’s own).  The biggest problem the first time around was that the cake was incredibly crumbly, however this go-around I adjusted the baking time and perfection was found. Since yays and nays were established in the previous post, enjoy the photo montage of the process as well as the final results!

Buttered cake pans dusted with cocoa powder  to give the final cake a lovely matte sheen!

The finished cake, almost too pretty to frost!

The final spread complete with sparkler candles to celebrate 35 years

By taking the butter cream base, adding a splash of coconut rum, and garnishing with toasted coconut, a delicious coconut butter cream is created!

Cutting the cake! Happy Anniversary!

Analysis of the Frosting
To make the coconut butter cream, I simply take the butter cream base, add some coconut rum and garnish with toasted coconut to bring the subtle but sweet taste of coconut to the picture! It’s a gentle enough combination that even people who don’t like coconut have praised the creation.

Mocha Frosting Analysis

Chocolate Cake with Oregon Strawberry Cream Cheese Frosting

22 Jul

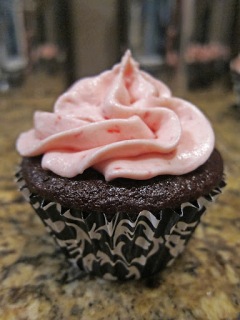
July has certainly been the month of cupcakes with the numerous birthdays and celebrations that popped up. We round out the month with a return to finding the best chocolate cake and exploring a heavenly sounding frosting flavoring suggested to me by a friend. These cupcakes were a birthday present for my dear friend Melanie (there’s your shout out!) who has a soft spot for cream cheese frosting so I figured there wouldn’t be a better audience to test these out on!

All packaged and ready to be delivered to the birthday girl!

Analysis of the Cake
The last time I made chocolate cupcakes was way back in April, but after a recent visit to Miette bakery in San Francisco (my own personal Mecca of cupcakes and bakery decor) and a sampling of their chocolate cake, I’d been recently feeling inspired to attempt to recreate it. But, I was also torn because I got my yellow cake recipe from Miette’s cookbook as well and a part of me wanted to explore some of the other cookbooks whose cake recipes have been relatively untouched by my crafting. But, a sign from the heaven’s came down unto me as I was searching through Rose’s Heavenly Cakes. There within it’s pages was Miette’s chocolate cake recipe. So, since it was in two separate cookbooks I decided I should just give it a go.
The Yays

  • Holy cow does this recipe pack a chocolatey punch. Using 70% dark chocolate courtesy of Scharffen Berger and natural cocoa powder, the cupcake delivers on a dark, strong but not overpowering, and smooth chocolately taste. 
  • That same strong chocolately taste is strong enough to match equally flavorful frostings without being lost in the mix. As was noted in my previous chocolate cake adventure, the last recipe I used was overpowered by the mocha frosting.
  • The techniques used for mixing deliver a foamy soft batter (whipping the eggs, straining the batter through a sieve as a final mixing step to avoid over mixing) and a subsequently light/airy cupcake
  • Those who know me well also know that a lot of times cake is a just a vehicle for me to eat frosting, my one true love. But these cupcakes are so damn good they don’t really need frosting, I would literally just eat the cake and skip the frosting. That’s fairly unheard of for me.

The Nays

  • The cupcake did not hold its structure well by the last bites but I think it’s my fault and not the recipes. I would like to try this recipe a second time but maybe cook it for less time to avoid the breakage that ensues.
  • There is literally nothing else wrong with this recipe

Overall Impression: ohmuhlord, this is definitely the new winner for chocolate cake with some minor tweaking the second time around.

Analysis of the Frosting
Cream Cheese Frosting. 

  • Although the last time I made this particular recipe I wasn’t sure if it was the best cream cheese frosting, the more feedback I got from others (and a few more samplings myself), the more I decided it was addictingly delicious and the cream cheese frosting I will crown as perfection.

Strawberry Flavoring

Overall Impression: Ohmuhlord this is amazing and the combination of strawberry and cream cheese is simply to die for. De-lish.

Lemon Cake with Lemon Buttercream Frosting

14 Jul

After originally tasting these cupcakes, I wrote the most bitter (yeah, pun probably intended) blog post ever. The flavor just was not what I was expecting at all and I was slightly heartbroken at the failed adventure as these cupcakes are a gift for a 65th birthday extravaganza. But, I took another taste later and the tart after-tart was not so mouth-puckeringly bitey and I received confirmation from my official taste tester, and boyfriend extraordinaire, that this was indeed how they were supposed to taste. What follows is a less emo post about my first adventure in lemon cake and lemon buttercream.

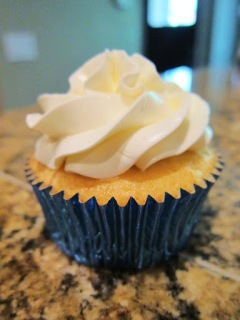
Soft, sweet, and very very tart

Analysis of the Cake
I spent a great deal of time reading through the recipes in my cookbook collection and weighing the pros and cons to each one before finally settling upon Cake Love‘s “Light and Lemony” recipe. What drew me to this recipe originally were the multiple lemon flavor sources (segmented, limoncello, lemon oil) and the sour elements to counter the sweet (cream cheese, heavy cream). Also, it was the only lemon cake recipe I had that stated it could be made into cupcakes as well as other cake forms. I’ve previously made a spectacular lemon cake that would not translate well into cupcakes (however see nays for the shocking results).
The Yays

  • New technique learned! How to segment a lemon! I did pretty well for my first try too. Lesson learned though: wear gloves. My dry nurses hands felt like the fire of a thousand suns by the second lemon. According to the recipe, by using a segmented lemon the lemon juice flavor is still translated into the batter but since it’s still contained in it’s pulpy cocoon the batter doesn’t get too watered down. Noted.
  • New ingredient used! Turbinado sugar! Smells like happy! Supposedly makes a huge difference but honestly I’m not really sure it did in the end. In fact, the batter was almost a little too gritty-sugary tasting. 
  • The cake has a wonderful texture, light, spongy, kind of melts on your tongue. Almost like cotton-candy cake.
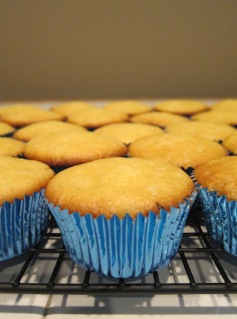
  • They baked quite lovely and had a wonderful golden top as seen in the photo above. I did have to extend the baking time by quite a bit however, but all is well that ends well.

The Nays

  • I’m definitely not sold that this is the best lemon cake recipe in existence. I still feel that the tart aftermath is a drawback and a recipe with a more subtle tartness would be much more pleasant on the palate. The first cupcake I had was difficult to finish because it was so tart but the second more mellowed out sample I had still had the tartness but perhaps not in as strong of a form as the first (or so I hope).
  • The cupcake paper does not want to let go of the damn things, which is something I’ve experienced with lemon cakes before. It was a disappointment because I thought that since this recipe specifically gave directions for cupcakes this problem would be avoided. Lies.

Overall Impression: Bleh, probably won’t re-visit this one

Analysis of the Frosting
The good news is the frosting is simply to die for. With our base of Italian Meringue Buttercream, I added pure lemon oil as suggested by Rose’s Heavenly Cakes. This too was a heavily deliberated choice and in the battle between limoncello, lemon oil, and something else (I honestly can’t remember at this moment) the sage advice from my mother (who has spent years perfecting a lemon cheesecake) was to go with the lemon oil as it was the least artificial tasting. And that advice was spot on. Sweet with a hint of lemon it was the perfect, light, and refreshing taste you would expect from something of the lemon variety.  
Overall Impression: Ohmuhlord, this one’s a keeper

It’s hard to go from something as wonderful as my recent endeavor with red velvet cupcakes to something that missed the mark, but that’s why I’m on this quest so that I can filter through everything and find the best of the best. Until next time, keep on keepin’ on!

Red Velvet Cake with Cream Cheese Frosting

8 Jul

I have a confession: I find red velvet cake to be somewhat gimicky (I am also confused as to the appeal of funfetti cake which is also flavorless). It never tastes like anything, and when this fact is presented people pretty much always respond with “That’s true, but I really like cream cheese frosting.” So it seems as though we are all eating tasteless cake just to get cream cheese frosting when really we could plop the frosting on a number of other types of cake that actually taste like something.

But, I came across a recipe from America’s Test Kitchen (the holy grail for most any recipe) and decided if they couldn’t win me over, nobody could.

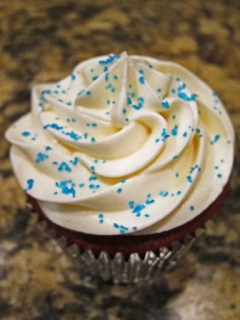
Had to add some blue sprinkles as these were made for a belated 4th of July party!

Analysis of the Cake
I have to admit, this was the best red velvet cake I’ve had to date. Well played America’s Test Kitchen, well played. I’m not necessarily convinced enough that I would incorporate it into my regular rotation, but it was winning enough that if someone requested red velvet cake, I would at least have some delicious ammunition to win them over with.

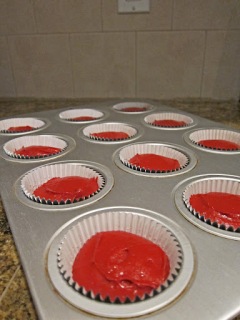
Velvety and Red, just the way they should be

The Yays

  • The finished cakes had the prettiest dark red color which was exciting because I’ve definitely made red velvet before that had kind of a tinge to it which is always disappointing
  • They actually tasted like something! I’d have to go back and compare recipes but off the top of my head my I thought it was due to the buttermilk, vinegar, and cocoa powder a flavored cake was born unto us. But, after a brief google search for red velvet cake every recipe has these. So I am somewhat dumbfounded as to the how and why, but all I know is it actually tasted like something instead of a flavorless cake so win.
  • The finished product was super moist and the flavor did hold its own well against the cream cheese frosting, one did not out compete the other
  • I managed to get no red food coloring on anything which is a huge win for me. My clothes, towels, and the rest of my kitchen are intact (this has more to do with my ability to avoid an accident than anything the cake did, but knowing my track record with accidents this is a big deal.)
Inside view of the deep red hue

 The Nays

  • Still not completely sold on the whole red velvet trend, but again now I have a decent recipe in my repetoire.

Overall Impression: Somewhere between meh and ohmuhlord
 
Analysis of the Frosting
I used America’s Test Kitchen’s cream cheese frosting (might as well keep with the theme) and while it was good, I have to say I think I’ve made better. It’s been awhile since I’ve made cream cheese frosting so I may not be remembering it quite right (guess I’ll just have to do some taste testing 😉 ). I feel that previous recipes I’ve made have been a little tangier, which I like. However this particular recipe was a good blend of cream cheesy and sweet and also looked like a fluffy white cloud of heaven. My one complaint, and this is of all cream cheese frosting, is that I have a hard time piping it with the star tip because it’s just a little too soft/unstructured. But, seeing as how that’s just a texture thing in the future I would not use the star tip to frost with (problem solving at it’s finest).

Fluffy happy fun times

Overall Impression: Somewhere closer to ohmuhlord but still not quite there

Well team that concludes another adventure is seeking out the best recipes of treats known to man. Next up on the quest: a birthday request of lemon cake with lemon frosting. Stay tuned!